How to create your own Insignias addon
Intro - Installing Programs
1. Open Steam
2. Navigate to Library
3. Click on the dropdown menu above the games list and select "Tools"
4. Find "Arma 3 Tools" in the list
5. Install them.
Note: You can use any Text-Editor of your choice
Download the latest version and run the installer.
Step 1. - The Insignias
You first need to create the Insignias. (I will leave this to you)
The optimal size is 128x128 pixel (px).
Now save the Image(s) as '.png' file(s).
Step 2. - Download
It contains the following:
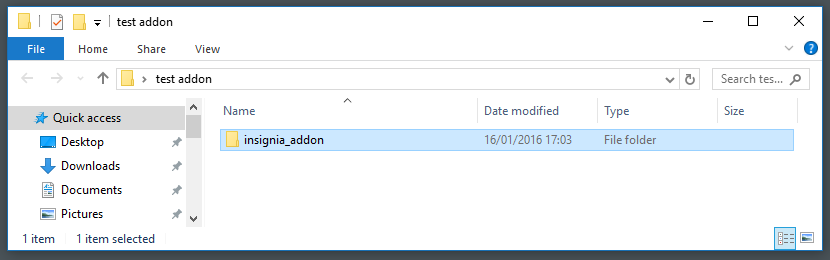
Step 3. - Creating Project Folder
Create a folder somewhere for your project, I called mine 'test addon'.

Step 4. - Creating Addon Folder
Open the folder you just created and extract the files from the 'addon.zip' you downloaded before into it.
Now you should have the folder called 'insignia_addon' in there.
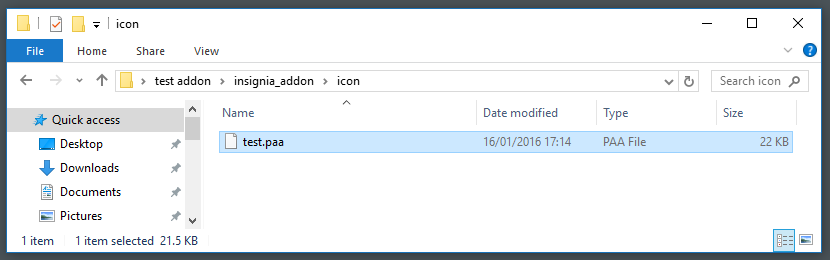
Step 5. - Open the texture folder
Open the 'insignia_addon' folder and go to the 'icon' folder.
You will find a file called 'test.paa' in there, this is a 128x128 px Image converted to the .paa file format, which is the texture format for ArmA.
Step 6. - Replacing the test.paa
Because you obviously want to use you own Insignias you need to convert your png files from earlier to the .paa format.
Let's get your .png's ready.
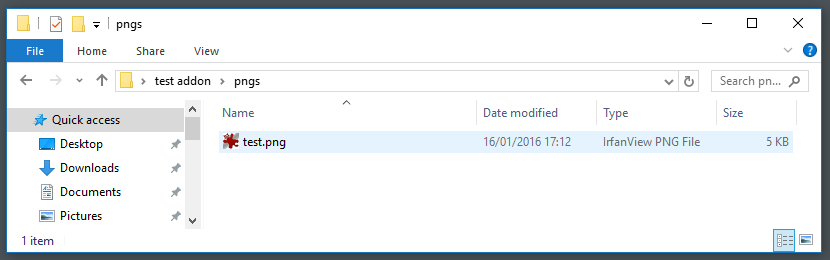
In your addon folder (I called mine 'test addon'), create a new folder and call it 'pngs'.
Now move all the .png files you created at the beginning in it.
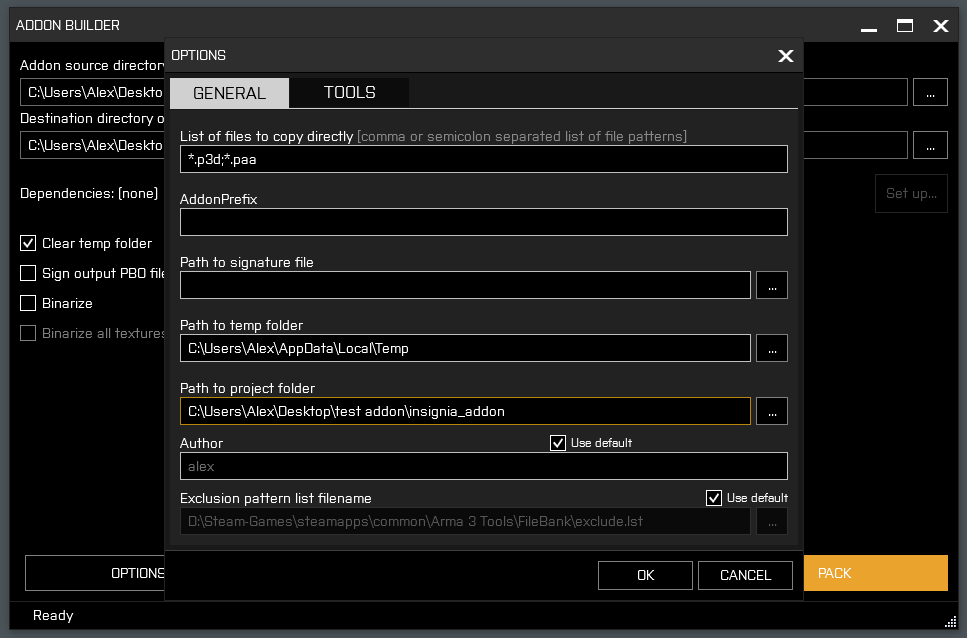
1. Open the Arma 3 Tools.
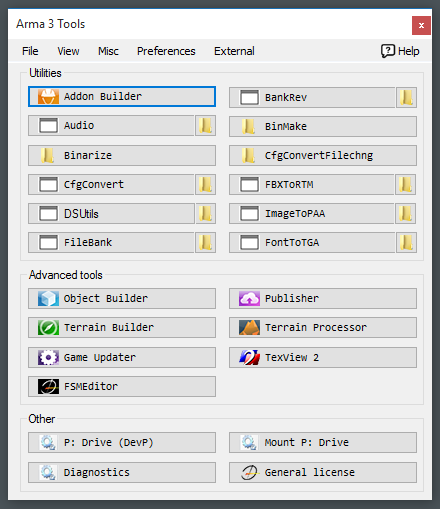
2. Open 'ImageToPAA'
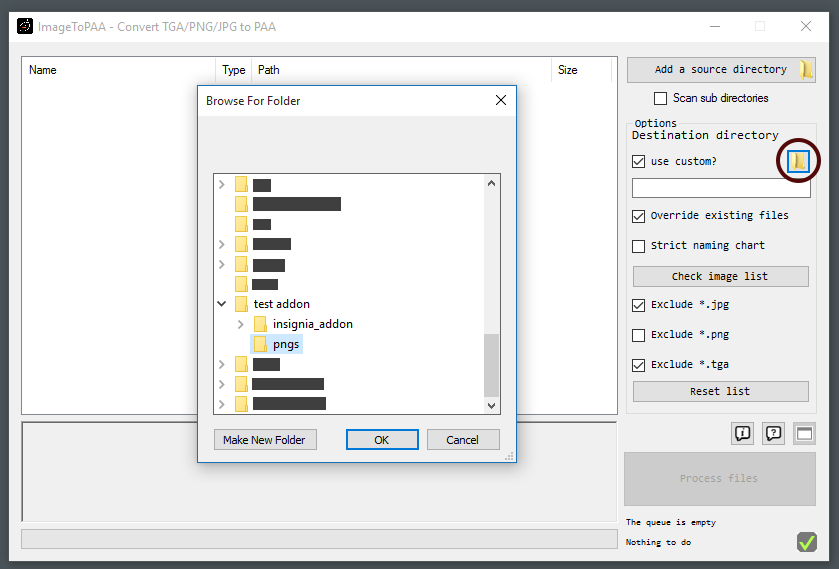
3. Check all the checkboxes that are checked in the image above.
4. Click 'Add a source directory' and select the folder 'pngs', where all your insignias are in.
5. Click the Folder Icon in the red circle and select the folder 'icon' in 'insignia_addon'.
6. Click process files.
Step 7. - Editing the Config.cpp
Open the 'Config.cpp' in the 'insignia_addon' folder wit Notepad++ (Rightclick 'open with Notepad++').
1. Change 'author' and 'authorUrl'. You can also change 'insignia_addon' to something you like (dont use spaces)
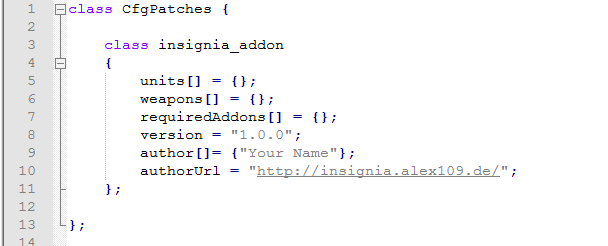
We can now get startet with adding your Insignias.
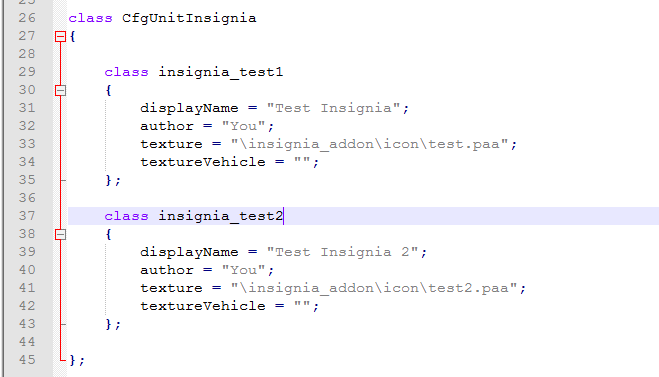
2. Edit the first block of code:
Change the class 'insignia_test1' to something else (no space, just stick with _). This needs to be unique (dont use it twice).
Change the 'displayName': 'Test Insignia' to something you like
Change the 'author': from 'You' to your Name
Change the 'texture': change the 'insignia_addon' if you changed the Class of the addon above to the new Class name.
Change the 'test.paa' to the name of you .paa
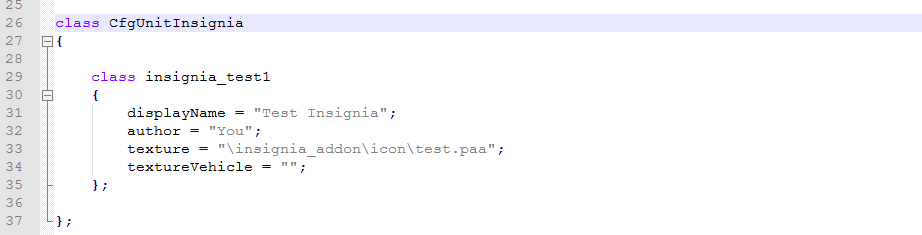
If you want to add more Insignias just copy the block of text like this:
Step 8. - Before packing
New you should have a folder stucture like this:
( test1.paa)
( test2.paa)
( test3.paa)
Step 9. - Pack the Addon
Open the Arma 3 Tools and open the Addon Builder
1. Select the 'insignia_addon' folder at the top
2. Below, put in any other folder and the name of you addon (the class you set in the Config.cpp in this example it was 'insignia_addon') and .pbo at the end
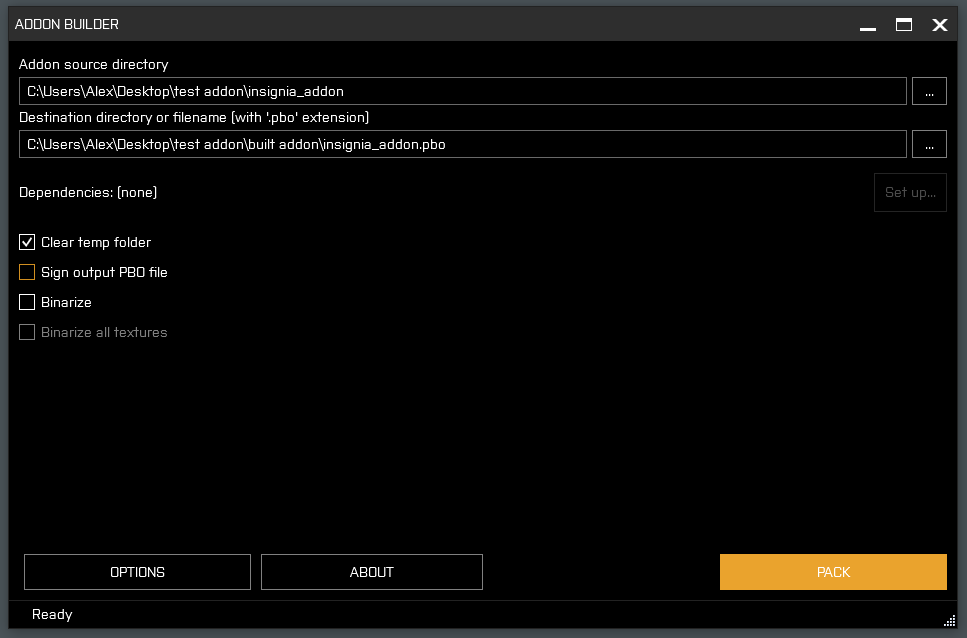
3. In Path to project folder select the folder from 1.
4. Go Back and click PACK.
Step 10. - Install
To Install your new addon:
1. Open your Arma 3 Folder
2. create a new Folder called @YourAddon
3. Create a folder called 'addon' in there (You can change the @Your Addon to anything but this Folder must be named 'addon')
4. Place your .pdo file you created in the 'addon' folder
5. Open Arma
6. Go to Parameters
7. Check the mods box
8. put in @YourAddon;
9. Hit Play
Trouble with something? Questions?
If you have any problems, feel free to join the group on steam: click here
About
Guide written by alex#
Last update: 18th Feb 2022, 1:00 CET